
5 Charcoal Grilling Mistakes That Are Easy To Fix and Will Level Up Your Grilling Game

Master your charcoal grill faster by avoiding these 5 common mistakes. Learn simple tips for setup, fire control, meat prep, and building backyard grilling confidence.
Fix These Grilling Mistakes and Level Up Your Grilling Game
There’s something unbeatable about grilling over charcoal — the smell, the sound, the flavor you just can’t get from gas.
But even the most enthusiastic backyard warriors can run into trouble if they don’t master the basics.
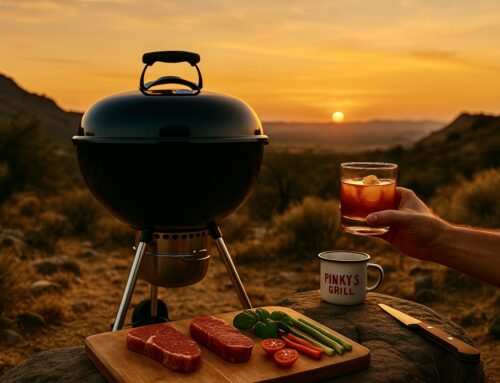
At Pinky’s Grill, we’re here to keep it simple, real, and fun.
Here are the top 5 mistakes new charcoal grillers make — and how to dodge them like a pro. 🔥
1. Get Ready: Why “Mise En Place” Matters (Don’t Worry, We’ll Explain)
You might see the term Mise En Place (pronounced meez-on-plahss) and think, “Whoa, that sounds way too fancy.”
But trust us — it’s just a French term that means “everything in its place.”
And it’s a game-changer at the grill.
The Mistake:
You light the coals, throw on the food, and realize you left your tongs, seasoning, or serving platter inside.
Running back and forth between the grill and kitchen is how meals get burned, flare-ups happen, and stress takes over.
The Fix:
Before you light the grill:
- Set out all your tools (tongs, spatula, grill brush, meat thermometer).
- Season your food and have it ready to go.
- Keep plates and foil nearby for resting and serving.
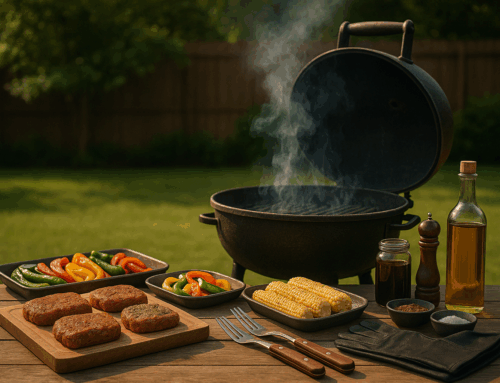
Pinky’s Pro Tip:
Use half-size baking pans or grilling prep trays to organize your ingredients and tools.
You’ll have everything ready and easy to grab — no scrambling, no stress.
2. Know Your Cook Time, Know Your Meat
Not all meats are created equal — and not all grilling should happen hot and fast.
The Mistake:
Throwing every type of meat on the same fire and expecting everything to cook perfectly.
The Fix:
- Understand your cuts:
- Thin cuts (like burgers, hot dogs, flank steak) = hot and fast.
- Thick cuts (like pork shoulder, ribs, whole chicken) = low and slow.
(Quick Note):
“Hot and fast” means cooking food directly over high heat to sear and finish quickly — perfect for thinner cuts like steaks or burgers.
“Low and slow” means cooking over lower, indirect heat for longer periods—ideal for keeping thicker, fattier cuts like ribs or pork shoulder juicy and tender.
Pinky’s Pro Tip:
- Fatty meats (pork shoulder, ribs, brisket) cook better low and slow.
Slow cooking allows the fat to render properly, keeping the meat juicy and flavorful. - Lean meats (like pork loin or boneless chicken breast) cook better fast and hot.
Going low and slow with lean cuts dries them out — so sear them quickly over direct heat and enjoy juicy results.
Essential Tool:
Always, always, always use a meat thermometer.
Guesswork leads to dry food — or worse, undercooked food.
3. Temperature, Temperature, Temperature
Managing heat is where most new charcoal grillers stumble — but it’s also where real mastery begins.
The Mistakes:
- Using too much or too little charcoal.
- Skipping the two-zone setup.
- Poor temperature control from open/closed vents.
- Not letting the grill heat up properly before cooking.
- And — big one — using lighter fluid (NEVER use lighter fluid. NEVER do it).
The Fix:
- Use the right amount of charcoal for what you’re cooking:
- Fill about half to three-quarters of a standard charcoal chimney for hot and fast grilling (steaks, burgers).
- For low and slow cooks (ribs, pork shoulder), fill the chimney all the way up for a longer-lasting fire.
Need even more time? Add a few unlit coals around the fire and let them catch slowly over time (“minion method”).
- Use a charcoal chimney to light your coals — no chemicals, just pure heat and great flavor.
- Be patient: once your coals are lit, wait until they are about 75% covered in white ash before you start cooking.
(That’s when they’re at the perfect heat and ready to perform.) - Build a two-zone fire:
- Direct heat side for searing
- Indirect heat side for slow cooking
- Control your grill’s temperature with your vents:
- Open vents = hotter
- Closed vents = cooler
Pinky’s Pro Tip:
Mastering temperature control is what separates backyard rookies from backyard heroes.
Think of it like steering a ship — learn how to adjust your course, and you’ll always stay on track.
4. Not Keeping a Grilling Logbook
If you’re serious about getting better, you need more than just memory.
The Mistake:
You learn something new every cookout — but forget it by the next weekend.
The Fix:
Keep a simple grilling log.
Jot down:
- What you grilled
- How long it cooked
- What worked (and what didn’t)
- Notes on setup, timing, temperatures, weather, anything.
Pinky’s Pro Tip:
Snap quick photos of your grill setup, fire, and finished food.
When you combine notes with pictures, you build your own grill master playbook — one great meal at a time.
5. Too Fancy, Too Soon
You just bought your first grill.
Do you really need to attempt a 42-ounce tomahawk steak on day one?
The Mistake:
Trying something complicated before you’ve built basic fire skills leads to frustration (and expensive disappointments).
The Fix:
Start simple:
- Grill a flank steak, chicken thighs, or veggie skewers.
- Master managing the fire, controlling the temp, flipping at the right time.
- Build wins, build confidence — and then move on to the show-stoppers.
Pinky’s Pro Tip:
Every grill master started somewhere simple.
Master a handful of core skills first — your victories will taste even sweeter later.
🔥 Final Thoughts: Fire Up Your Skills, One Cookout at a Time
Great grilling isn’t about being perfect — it’s about getting better every time you fire it up.
Every meal you cook, every lesson you learn, builds the confidence that turns good weekends into unforgettable ones.
At Pinky’s Grill, we believe every backyard has a hero — and it starts with mastering the basics, having fun, and owning the fire.
FAQ’s
Q1: What does “Mise En Place” mean, and why is it important for grilling?
A: Mise En Place is a French term that means “everything in its place.”
In grilling, it simply means having all your tools, ingredients, and prep work done and ready before you light the fire.
When everything is organized and within reach, you stay focused, avoid running back to the kitchen, and make your grilling experience much smoother and more enjoyable.
Q2: How do I know if I should grill a cut of meat hot and fast or low and slow?
A: It depends on the fat content and thickness of the meat:
- Fatty cuts (such as pork shoulder, ribs, and brisket) cook better when cooked low and slow, allowing the fat to render and build flavor.
- Lean cuts (like pork loin, chicken breasts, or flank steak) do best hot and fast to keep them juicy and tender. Always use a meat thermometer to hit the right doneness!
Q3: How long should I let my charcoal heat up before cooking?
A: After lighting your coals with a charcoal chimney, wait until they are about 75% covered in white ash — usually around 15–20 minutes.
This ensures your grill is at the perfect cooking temperature and ready to deliver great flavor without guesswork.
Q4: Why is the two-zone setup so important for charcoal grilling?
A: A two-zone fire gives you direct heat (for searing) and indirect heat (for gentle cooking).
Without it, you risk burning the outside of your food while leaving the inside raw, or you have no way to control flare-ups when they happen.
With two zones, you can grill smarter, not harder!
Q5: Do I need to keep a grilling log book?
A: If you want to improve faster, yes!
Even simple notes about what you cooked, how you set up the grill, how long it took, and what you’d tweak next time will help you build confidence and consistency.
Over time, your log becomes your personal grilling playbook — full of wins and lessons learned.
Q6: Should beginners try grilling big cuts like tomahawk steaks or brisket right away?
A: Not yet! It’s smarter (and way more fun) to start simple with cuts like flank steak, chicken thighs, or burgers.
Master controlling fire and temperature first, and when you’re ready, you’ll crush those big, impressive cuts with way more confidence.